Acura Legend Forum banner

Lusting for a twin turbo setup, and would like (helpful) ideas

142K views 1.5K replies 96 participants last post by  Telion  
#1 · (Edited)
First I apologize for the serious teaser and putting up pics of a project without results and dyno's because there are none. And who knows how long it could be before I go any further it could be a year or more! I just love hearing the ideas suggestions, feedback and knowlege you all have to offer. Isn't that a bulk of what we are here for? :) Well as many of you know I am currently underway with the Supercharger setup. It has been a very slow process but is still underway and the manifold for it is now being welded from what I understand.

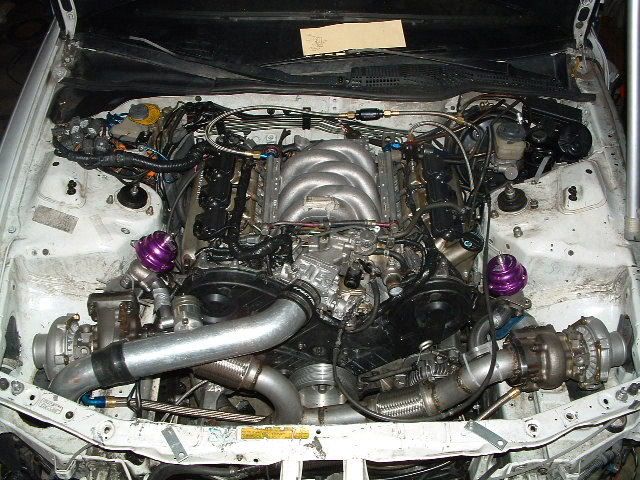
I could not get over how much I loved Hotlava's tt setup and it overcame me. So I figured at some point in the future I also wanted to do a tt setup and began slowly buying the additional pieces it would take to do so (being that many are the same, such as injectors, fuel pump monitoring gauges and what not). Then last week my car decide to get some garage time (it broke down later found to be a broken axle, Ebay? I think it was tsk tsk). But none the less it was a perfect excuse to play while she was down so I started to look at how I would eventually want my tt to be setup. What better way than to play. It helps kill concepts that look good in your head given the (not so) workable space; a few of my ideas have since died. But long story short this is where I am at so far. Now that my wife knows that it is just a broken axle I only have shipping time to continue playing before having to put her back together again.

A couple quick notes

-No this will not be done/completed for a very very long time.-This is very new to me so I would be the last to ask for suggestions though I love to share ideas.
-Yes the supercharger project is still underway and taking precedence over this.

-No I did not wake up one morning and say I am going to do a Legend Twin turbo setup during breakfast (sorry Hybird, that just kills me lol)
-No I am not going to be using PVC intercooler piping it is just cheaper to hack away at till I figure how I am going to do it when the time comes.
-I have also read up on some articles of Twin vs. Single and each seem to have there advantages from knowlegable members of their respective forums.
-cheap clamps will be replaced with t-clamps.

Ok the book is done here's the pics. (excuse the mess my garage is at war)
also please forgive the ugly "stand in" mesh and terrible paint, looks will come last. I don't want to tear it up after doing body work and paint.
Image


Image


Image


Image


Image


This one concerns me, there is not much rook and there is a damn brake fluid line that may need to be relocated. wires and hoses I don't mind moving brake, AC, and power steering lines I am not so happy/experinced with.
Image


Hopefully at some point I will be done destroying my car and be able to build it up like the one in my head lol.

-Tip- If you get a new intercooler or radiator, cover the fins with cardboard until it is fully installed so you don't damage the fins during installation :hide:

PS. The purple finish and and nice shiney engine bay will be back in time. it was too hard to maintain and not scratch to hell while getting a bug of some sort and doing stuff like ^ this. I think eventually I will powdercoat vs. paint though.
 
#837 ·
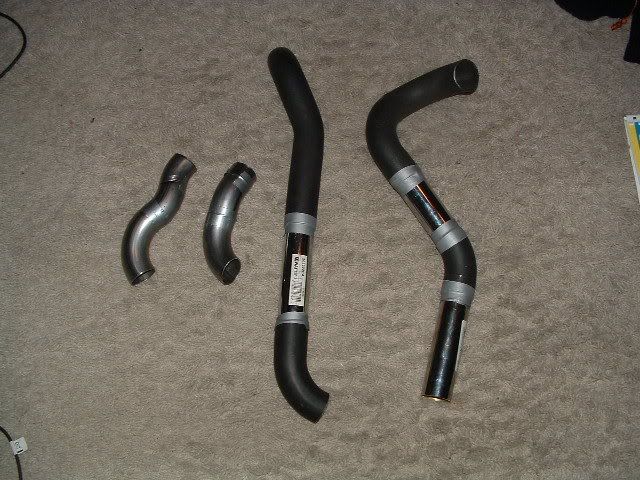
Ok out of boredom and indecisiveness I decided to go ahead and fabricate the pieces that redirect the wastegate into the downpipe and make a set of dump pipes that vent to atmosphere without catching my car on fire lol. I didn't want to do the pieces that vented to atmosphere do to all of the bends it would take and the cost of the elbows. Then I remembered the $60.00 350z headers I hacked up for nothing and that they too deserved to not be a waste of money :) so I put them to good use.

A little info I didn't know prior to this build

The reason this decision was difficult was because you gain hp by venting to atmosphere (but it won't pass emissions/inspection). You also gain hp by running the BOV blowoff back into the intake manifold, which I will also be doing. You simply can't pass up free hp. Here's the picks of the piping less the flanges that are not in yet.

I need to get some 1.5" straight pipe to replace the chrome part. From left to right the pieces are
Drivers side redirect to exhaust, passenger side redirect, passenger side atmosphere, driver side atmosphere.
Image
 
#839 ·
I was reading about it on and offline many it was proven so on a few cars on in Dyno comparisons. Though the gains are minimal (2-5 whp on average for both) they are gains. I can see what I can dig up, have you tried this comparison on the Legends motor because that would certainly be more accurate and some good info to know.
 
#840 ·
Buzzard I am glad you check me on this because as I read more about the BOV recirculation to the intake manifold it so far seems to only be beneficial for cars that run an MAF sensor not a MAP sensor for the purpose of maintaining proper AFR between shifts. But I am going to keep searching and reading.
 
#843 ·
Yeah what he said ^ (glad to see the Legend Gods are still watching over me) :angel: as I am reading more about this it just seems that it will be safer and less complicating in my case to just vent the BOV to atmosphere. It doesn't make sense to redirect to to the intake line pre-turbo because the turbos are right off of the headers. I am not going to delete or change my error though to ensure others do not follow suit and read through this.
 
#846 ·
lol a good idea would be to know that you will get out of it what you put into it, when I began I set out to do this cheap to prove that it can be done. And as I got into it I learned that anything done on this scale should be done right unless it is expected to be done over, so in hindsight with all the assistance I have had yes this could have been done for about 1 to 1.5k but I chose to go in a direction that would yield less headaches as I increase power. I will say this much though you can go cheap on everything but the external wastegates, the muffler, and the turbos. And I cant even put a price on the welding
 
#847 ·
two more items need to come in then we will be going in for the final welding session :D after that it is just putting together the pieces to the puzzle, saying a few prayers, and eliminating CEL's that I encounter.
 
#854 ·
I dont think that is actually rust it is from the welding process. None of these parts have gotten wet or left the garage since being installed. but I will double check :)
 
#856 ·
I agree with that that is just the color of the metal heated and then cooled after the welding proccess.

I being reading some parts of your thread for at least an hour and is really going well, specially the header work congrats, I am also in the proccess of planning my header work and wanted to learn from your work that is why of the long reading lol, well just wanted to say that...:thumbsup:
 
#855 ·
Lol I hope its not rust. At least your project is getting there. So were you able to get the exhaust on right?
 
#857 ·
Yeah the rear flanges were just welded with the point of the triangle facing up instead of down which caused it to hit the heat shield. I am just going to trim it down so that it does not hit it and raise the shield a little then it is golden :) Now I need to figure how I am going to tuck the wire harness.I am considering in the valley of the V near the knock sensors and what not.
 
#859 ·
Just another pic in preparation to not end up with a melted wiring harness
Image
 
#860 ·
:yumyum: :yumyum: :yumyum: its looking great telion, nicely done!
 
#861 ·
Thanks, that should be about the extent of the wiring that should be seen.
 
#862 ·
Ive been looking at this thread every day since I posted on the first page of the thread.

The amount of custom work you have done, and the amount of research you have done behind the scenes is insane. I am confident that this this is going to run very nicely once you fire it up.

Waiting for you to finish is like a 5 year old waiting for Christmas morning.

Keep up the good work man! Everyone on the forum is cheering for ya!
 
#865 ·
#867 ·
I don't know about a trailer I think (hope) I will be able to street tune it via what I have on hand well enough to get it to a dyno shop. But on a similar note I see some has been busy; plan C music to my ears.

from: alienclay on May 27, 2008, 04:59:53 AM
Does this z110 file also apply to the C32A1 engine? (91-95 acura legend)
Also the C32A1 has two crankshaft position sensors, the 1911 fic only has connections for one. Is this a problem?

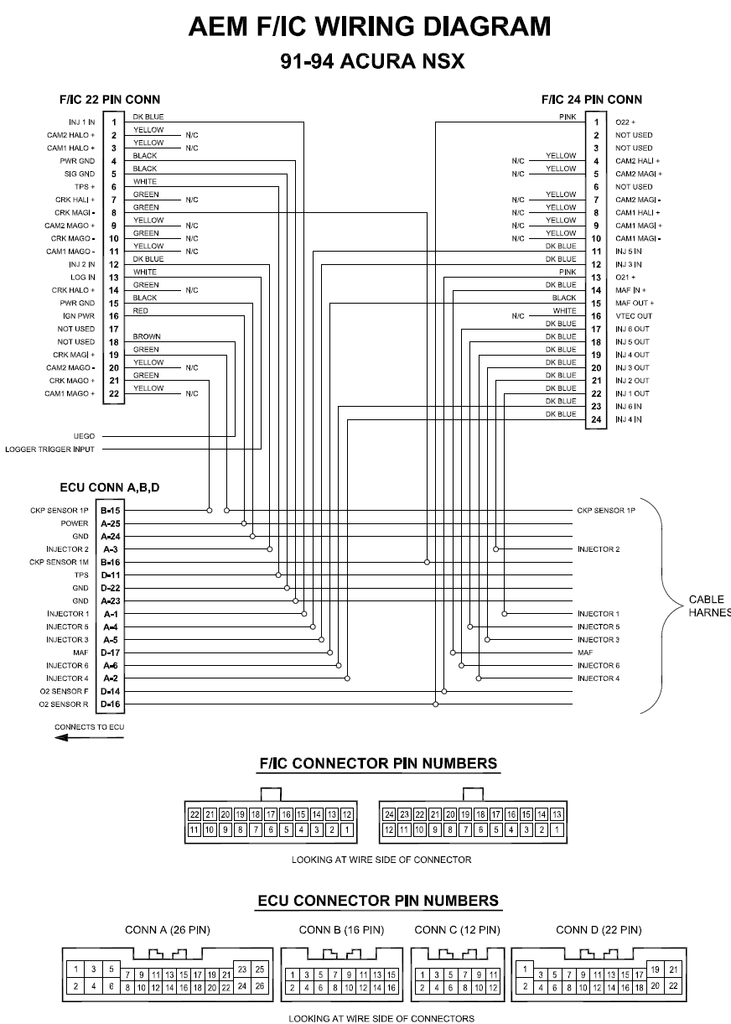
well well well, looks like the [AEM] fic 1911 also works well for the acura legend 1991-1995 wired and setup the same as the nsx 91.
(aem if you want to confirm call pure tuning in toledo ohio.)
 
#870 ·
Thanks guys, the exhaust has become more involved than I thought Joe is a Savior in this respect.

As for tuning, not being able to find the code for the 02 sensors in closed loop has been on my mind all day and I am yet to determine how I am going to find the code for it, so this is becoming more and more appealing by the moment.
F/IC Installation Notes: Acura NSX 91-94, 97-99

1. The FIC has an O2 table, which allows you to change the O2 signal that is sent to the stock ECU. For older cars, we recommend using the O2 table in Offset mode, with MAP as the load (y-axis for the O2 table). Values between -0.1 and -0.4 will change the sensor voltage in a way that makes the car run richer than 14.7 in closed loop mode. As with any other aspect of the car's tune, you should verify that your changes are working the way you intend them to. Without adjusting any other parameter in the FIC, you should be able to "trick" the stock ECU into running richer in closed-loop mode using the O2 table. This is very important: if you do not use the O2 table properly, the stock ECU will change the short- and long-term fuel trims until the AFRs are about 14.7 in closed-loop mode. I haven't personally tested the NSX, but most new cars respond VERY quickly to the O2 sensor voltage: for instance, adding 10% fuel via the FIC's fuel map caused the AFRs to change from 15 to 14 at idle, but the stock ECU detected the change and corrected back to 15 AFR in under ten seconds. If the car was tuned at 12.0 AFR and the stock ECU trims cause this to revert to 14.7 AFR that could cause engine damage. If at all possible, I would suggest tuning a couple of OBD2 NSX's so you can get an idea of what O2 voltages are required to keep them happy. Having an OBD scanner is a HUGE help in this case.

2. Resetting the stock ECU will not change the FIC's calibration, and should not change the way the car runs. A good tune should run well when the fuel trims are zero, and if the O2 table is configured properly the FIC will not cause the short-and long-term fuel trims to change significantly.
 
#872 ·
I started to PM you about this then thought you would likely see it here :) as far as support and cost it seems like a very viable option for me.
 
#873 ·
Whoa its been almost 10 pages since I caught myself up on this. Its coming along fantastically. I really appreciate how you've posted all the problems you've run into along the way, and how you went about correcting them. I understand when people leave these things out in a final build thread, but I hope you keep them. Thats the stuff that I really like.

No project ever goes like it was planned, and its the way that you find a creative solution that is intriguing to me. Not only does it let the rest of us have an emotional investment in each step, but it also allows us to live vicariously through you.

For a lot of us, the chance to be able to build a LEGEND as crazy as yours is not something we can realistically afford to do, especially for those of us in areas where Legend parts are pretty rare (imagine those South American guys chances) so its been really cool seeing every step. Keep up the great work!

For the 02 sensors.. Well, you know far more about tuning ECUs then I ever will, so if this sounds silly, pardon my ignorance:hide:

When Ford did the rare crazy mustangs, Cobra R, Saleens in the EEC-IV OBD1 era, the way they did 02 sensors was to just use non working 02 sensors that provided a constant voltage to the ECU that was always slightly rich. Then the rest of the sensors were used to tune the final mixture off the base 02 reading. That way they didn't have to worry about detonation.

Those motors are pushrod though, and tuning may be completely different for the Legends SOHC, and you might be way past what Im talking about, but I just thought Id throw it out there. Good luck and keep those updates coming!
 
#875 ·
Whoa its been almost 10 pages since I caught myself up on this. Its coming along fantastically. I really appreciate how you've posted all the problems you've run into along the way, and how you went about correcting them. I understand when people leave these things out in a final build thread, but I hope you keep them. Thats the stuff that I really like.

No project ever goes like it was planned, and its the way that you find a creative solution that is intriguing to me. Not only does it let the rest of us have an emotional investment in each step, but it also allows us to live vicariously through you.

For a lot of us, the chance to be able to build a LEGEND as crazy as yours is not something we can realistically afford to do, especially for those of us in areas where Legend parts are pretty rare (imagine those South American guys chances) so its been really cool seeing every step. Keep up the great work!

For the 02 sensors.. Well, you know far more about tuning ECUs then I ever will, so if this sounds silly, pardon my ignorance:hide:

When Ford did the rare crazy mustangs, Cobra R, Saleens in the EEC-IV OBD1 era, the way they did 02 sensors was to just use non working 02 sensors that provided a constant voltage to the ECU that was always slightly rich. Then the rest of the sensors were used to tune the final mixture off the base 02 reading. That way they didn't have to worry about detonation.

Those motors are pushrod though, and tuning may be completely different for the Legends SOHC, and you might be way past what Im talking about, but I just thought Id throw it out there. Good luck and keep those updates coming!
Thank you so much I really appreciate the depth of your response, it puts in writing what I have been hoping to share. I have been attempting to bring to the forum what I experience as I am going through this process (with a slight time delay in some cases).

About the 02 sensors I had a similar idea. I was thinking that the AFC intercepts and modifies the the fuel injectors and they are based on voltage output so why can't the same be done with the O2 sensors. Now if the ECU is coded to look for a certain voltage to = approx 14.7 AFR and it worked in a similar manner to other 0-5v sensors with around 2.5v being desirable than this could be possible with a resistor or something or possibly a potentiometer (variable resistor); but there are so many unknown factors. that would have to be thought through, but its a great idea to go on. I may have to come back to that.
 
#876 ·
Lol that has me thinking how crazy would it be if it were that simple, a wideband, a couple potentiometers, a Motorola 3 bar map sensor, and a chipped ECU. But honestly I won't be going this route.
 
#877 ·
Yeah thats exactly how the Ford EEC-IV works. I happen to remember that the 91 Cobra in particular uses just a slightly rich signal at all times. Im not sure if they just run the signal from a junction with resistors, or if the 02 sensors themselves have resistors built in to always send a constant signal.

I also met a guy locally recently who does what sounds to be similar with his chips, which he makes for people with turbo civic/teg builds. I don't know the specifics, or even if the Legend is the same (its obd1 plugs tho right?), but i think he would answer any questions if it would help. His chips eliminate the 02 sensors completely, you just take them out and screw in a stop. Whatever he is doing is providing the ecu with a slightly rich signal without the need for any external wiring.
 
#878 ·
actually it is a cross between OBD 1 and 2, and eliminating the O2 sensors I would not do.
 
#879 · (Edited)
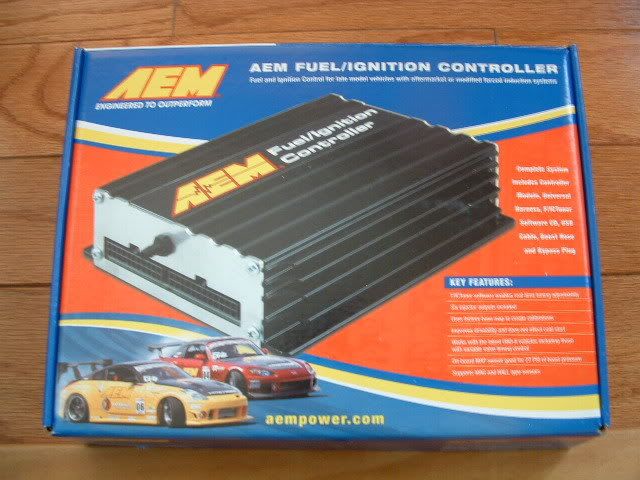
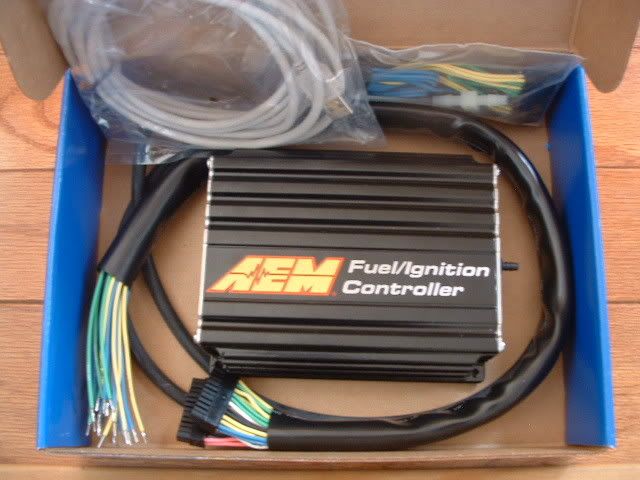
Ok you guys know me and my inability to withhold any information regarding this build so here is the direction I decided to go. I didn't want to take any uncalculated risks regarding engine management. I just have too much money (to me) into it to have it go into a closed loop AFR of 14.7 and cause a serious problem or damage. Though I do think that potentiometers would be effective I decided to address a couple other things at the same time. This solution addresses the map sensor, single cell map tuning ability, and having an item with an on-board interface and real-time tuning for my Car PC and/laptop. So at that point I knew what the clear winner was. Then I was able to find it at a smokin price of 318.00 shipped brand new after a discount coupon I had been sitting on.

Image


Image


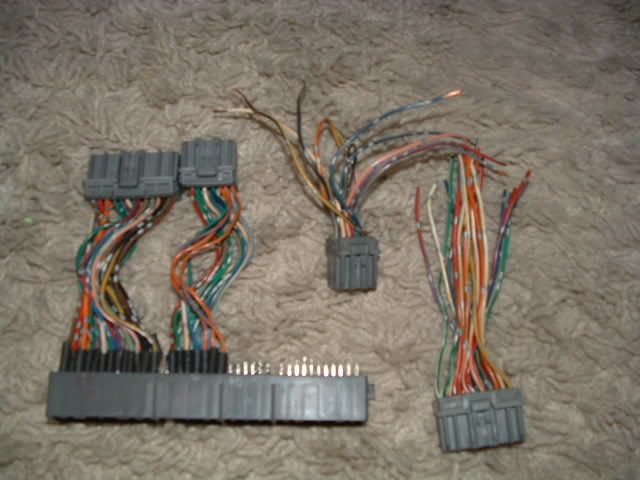
This is the pic of the conversion wiring harness that I am working on so that it is easier to transfer from car to car with the addition of a line to the manifold vac port.

Image


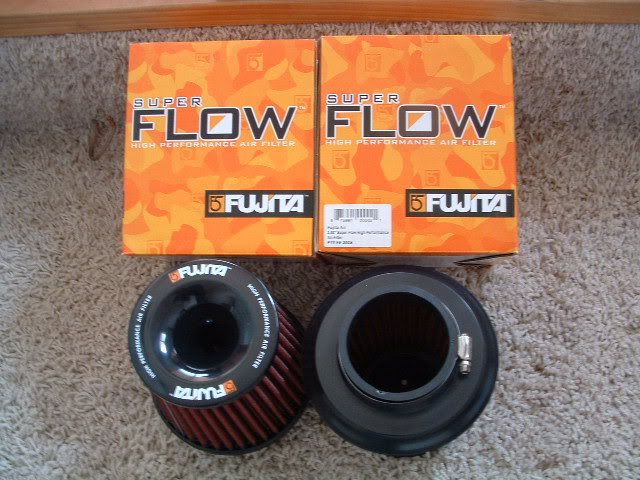
I also don't think that I mentioned in this thread that I did decide to go with Fujita on the intake filters.

Image


Image


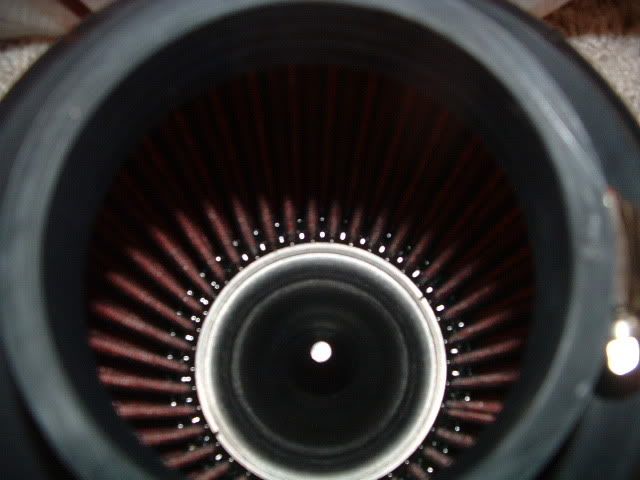
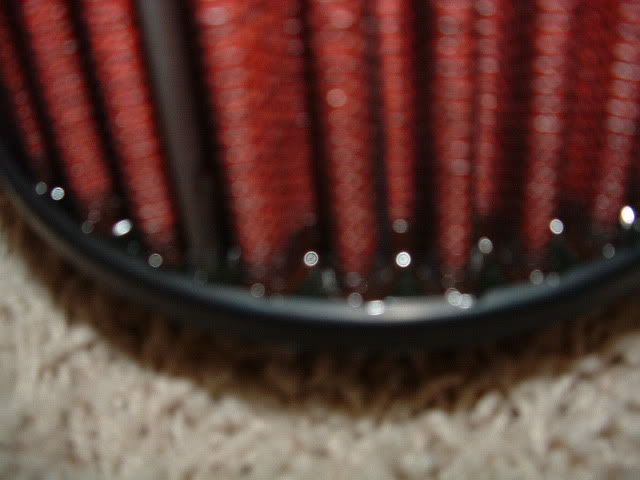
I am pleased with the amount of glue they used to seal these this often is an issue with cheap filters.
Image


Though it would be nice this doesn't come with the unit I found it on there forum.
Image